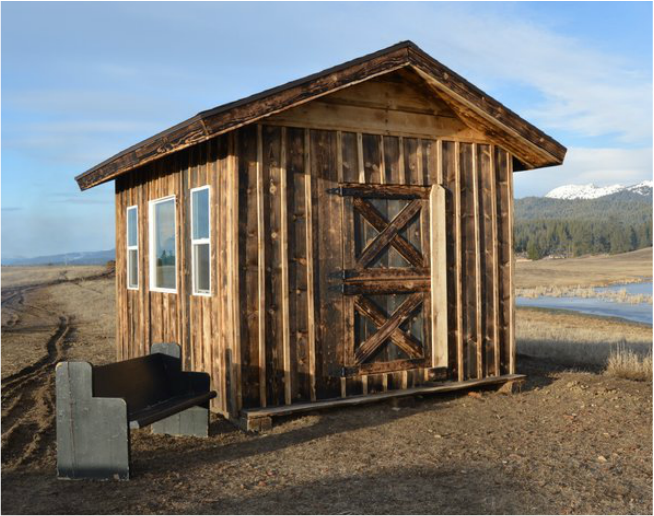
We decided to build a storage shed instead of paying for storage somewhere else. With the great advantage of having a log mill on the ranch my husband and his dad were able to cut all of their own boards from the trees on the ranch. So this shed could have cost around $4000, but only cost us about $600.
The materials we used were roofing and flashing, hinges, insulation foam, nails and railroad ties and the windows were second hand.

1st Start with a good solid foundation. Level it out. Either pour a cement pad with footings or put rail road ties down. We did the latter. we made sure the ground was level and set our rail road ties down. In our county you can build a shed up to 200 sq. feet without a building permit so ours is a 16’x12′ which equals 192sq. feet.
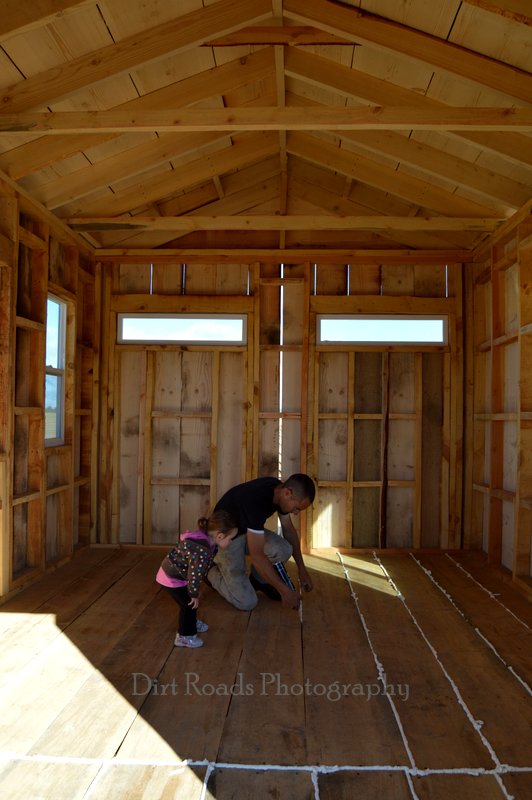
2nd Make a floor. We made wood planks. We laid them out right over the top of the ties.


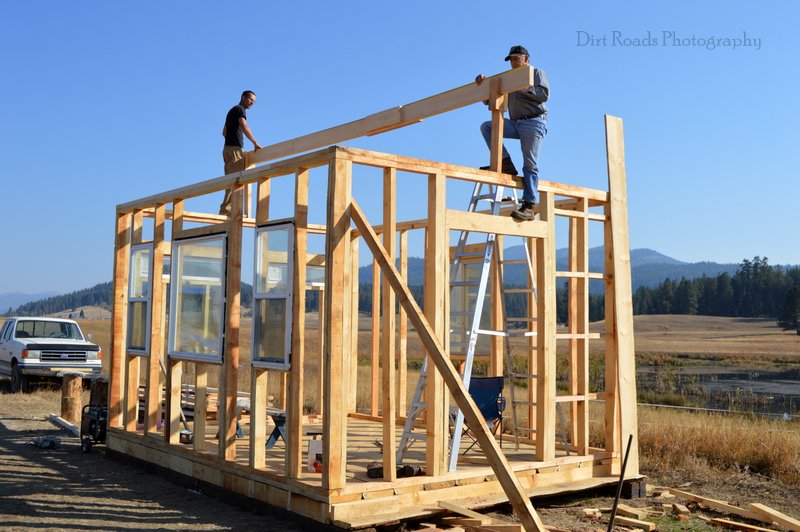
3rd Once your floor is on then frame up the walls. We designed the shed on graph paper how we wanted each wall laid out. After the walls are up and braced, nail all together.
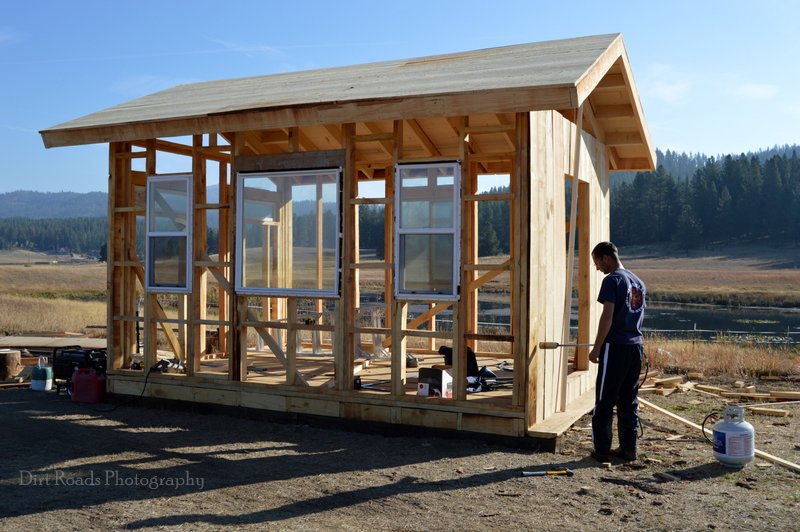
4th Put up the roof. You can build your own trusses and put either tin sheeting or asphalt shingles up on top. We did our own trusses, wood panels on top of the trusses, tar paper, flashing and then the asphalt shingles on top.

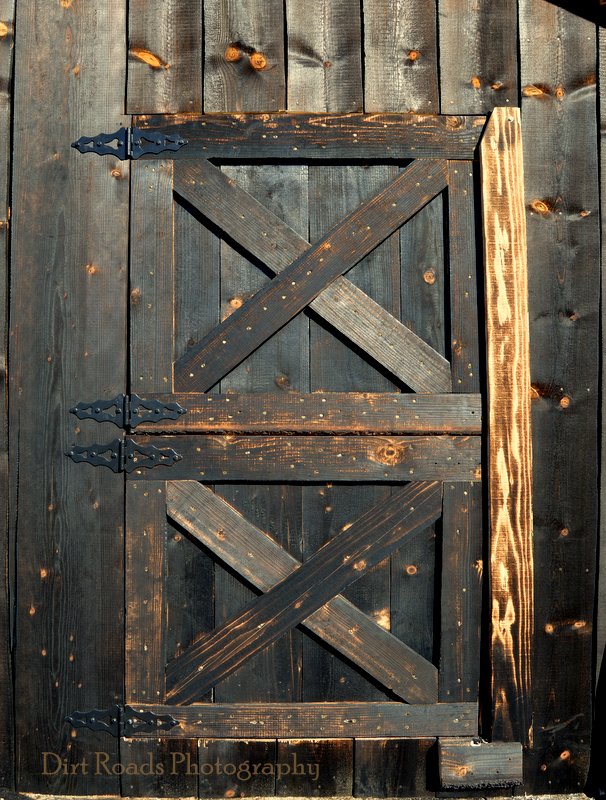
5th Is your Siding. We decided to use the Japanese method ‘Shou-sugi-ban’ of burning it to help preserve the wood. We really like how it turned out. We did this with a torch you can buy at a hardware store and a propane tank.
6th Is expanding foam for the floor and walls. This somewhat seals it up from the elements and mice. We later found out that chinking might have been better because the mice will chew through the expanding foam to get into the shed. But overall still worked great.


Come back to the blog to see more building projects we will be doing.
Categories: Building Projects, The Homestead